Transforms on KeyPoints
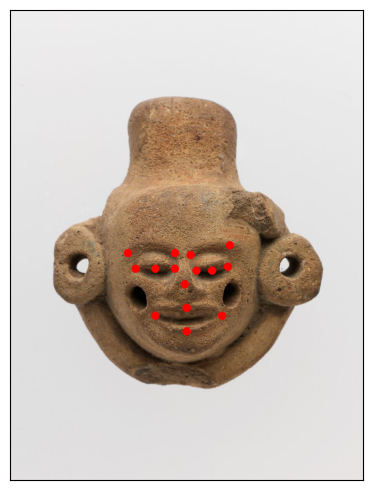
This example illustrates how to define and use keypoints. For this tutorial, we use this picture of a ceramic figure from the pre-columbian period. The image is specified “public domain” (https://www.metmuseum.org/art/collection/search/502727).
Note
Support for keypoints was released in TorchVision 0.23 and is currently a BETA feature. We don’t expect the API to change, but there may be some rare edge-cases. If you find any issues, please report them on our bug tracker: https://github.com/pytorch/vision/issues?q=is:open+is:issue
First, a bit of setup code:
from PIL import Image
from pathlib import Path
import matplotlib.pyplot as plt


import torch
from torchvision.tv_tensors import KeyPoints
from torchvision.transforms import v2
from helpers import plot

plt.rcParams["figure.figsize"] = [10, 5]
plt.rcParams["savefig.bbox"] = "tight"

# if you change the seed, make sure that the transformed output
# still make sense
torch.manual_seed(0)

# If you're trying to run that on Colab, you can download the assets and the
# helpers from https://github.com/pytorch/vision/tree/main/gallery/
orig_img = Image.open(Path('../assets') / 'pottery.jpg')
Creating KeyPoints
Key points are created by instantiating the
KeyPoints class.
orig_pts = KeyPoints(
    [
        [
            [445, 700],  # nose
            [320, 660],
            [370, 660],
            [420, 660],  # left eye
            [300, 620],
            [420, 620],  # left eyebrow
            [475, 665],
            [515, 665],
            [555, 655],  # right eye
            [460, 625],
            [560, 600],  # right eyebrow
            [370, 780],
            [450, 760],
            [540, 780],
            [450, 820],  # mouth
        ],
    ],
    canvas_size=(orig_img.size[1], orig_img.size[0]),
)

plot([(orig_img, orig_pts)])
Transforms illustrations
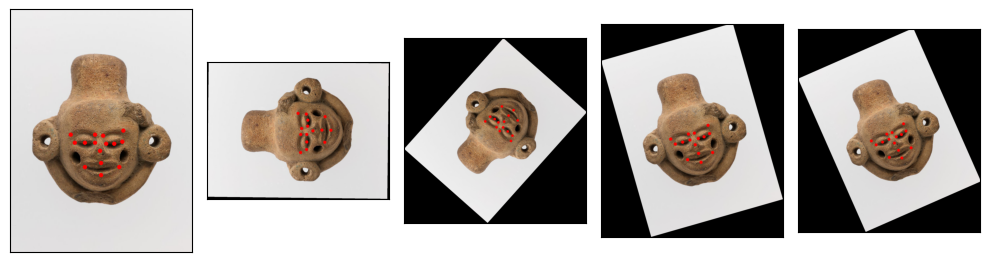
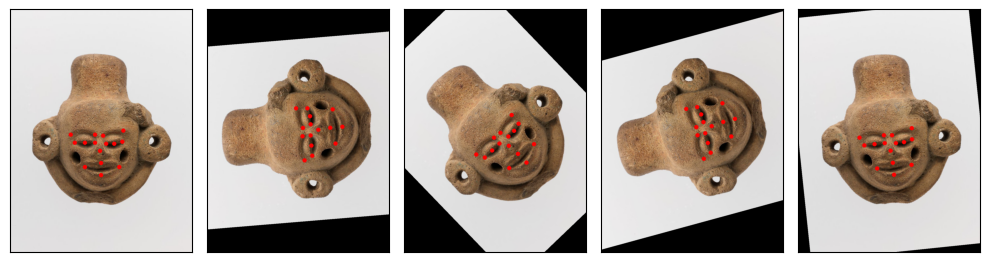
Using RandomRotation:
rotater = v2.RandomRotation(degrees=(0, 180), expand=True)
rotated_imgs = [rotater((orig_img, orig_pts)) for _ in range(4)]
plot([(orig_img, orig_pts)] + rotated_imgs)
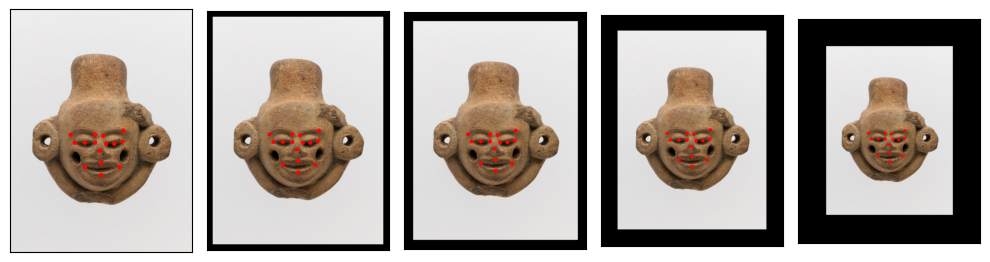
Using Pad:
padded_imgs_and_points = [
    v2.Pad(padding=padding)(orig_img, orig_pts)
    for padding in (30, 50, 100, 200)
]
plot([(orig_img, orig_pts)] + padded_imgs_and_points)
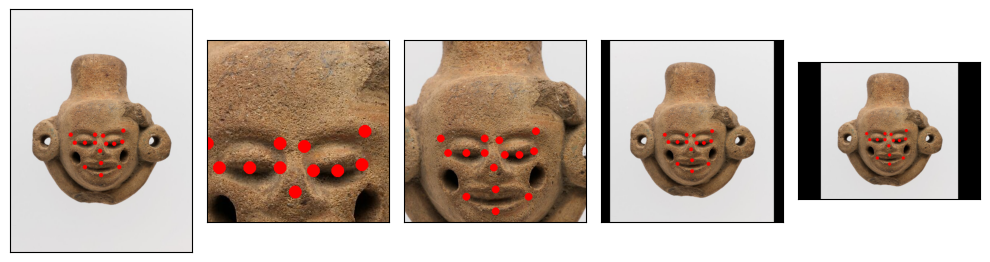
Using Resize:
resized_imgs = [
    v2.Resize(size=size)(orig_img, orig_pts)
    for size in (300, 500, 1000, orig_img.size)
]
plot([(orig_img, orig_pts)] + resized_imgs)
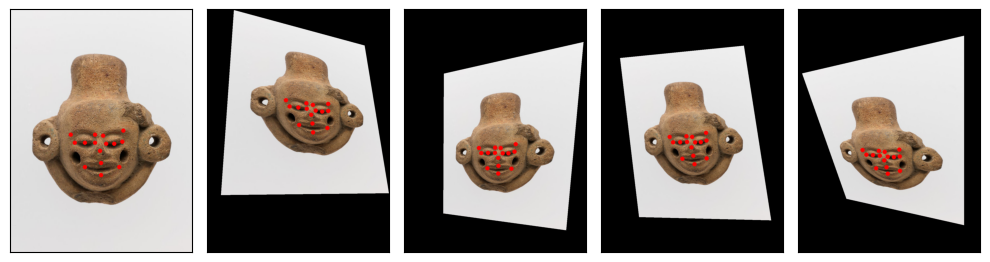
Using RandomPerspective:
perspective_transformer = v2.RandomPerspective(distortion_scale=0.6, p=1.0)
perspective_imgs = [perspective_transformer(orig_img, orig_pts) for _ in range(4)]
plot([(orig_img, orig_pts)] + perspective_imgs)
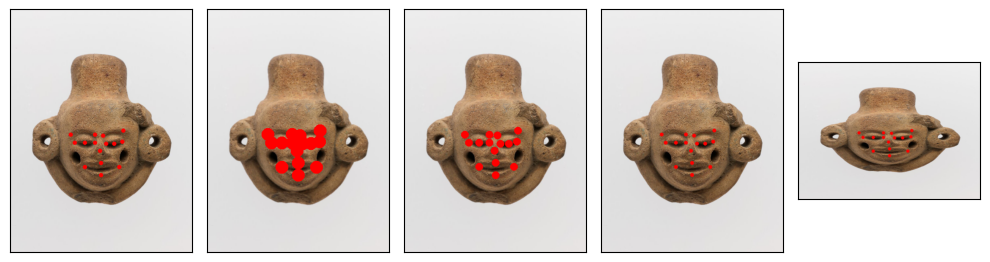
Using CenterCrop:
center_crops_and_points = [
    v2.CenterCrop(size=size)(orig_img, orig_pts)
    for size in (300, 500, 1000, orig_img.size)
]
plot([(orig_img, orig_pts)] + center_crops_and_points)
Using RandomRotation:
rotater = v2.RandomRotation(degrees=(0, 180))
rotated_imgs = [rotater((orig_img, orig_pts)) for _ in range(4)]
plot([(orig_img, orig_pts)] + rotated_imgs)
Total running time of the script: (0 minutes 2.946 seconds)
